Making vinegar at home is an ancient yet simple process that transforms everyday ingredients into a flavorful and versatile liquid. Whether you prefer apple cider, wine, or malt vinegar, the fundamental principle remains the same—fermentation. By allowing natural bacteria to convert alcohol into acetic acid, you can create a homemade condiment with a depth of taste that store-bought versions often lack. Not only is homemade vinegar cost-effective, but it also eliminates preservatives and artificial additives. If you’re ready to embark on this culinary adventure, let’s dive into the step-by-step process of making your very own vinegar at home.
Understanding the Fermentation Process
The process of making vinegar relies on two types of fermentation: alcoholic and acetic. Alcoholic fermentation occurs first, where yeast converts sugars into ethanol. Then, acetic acid bacteria transform that alcohol into vinegar through oxidation. This two-step transformation is what gives vinegar its characteristic tang and preserves it naturally. By controlling temperature, air exposure, and ingredients, you can craft a unique vinegar with rich, homemade flavors.
Choosing the Right Base Ingredients
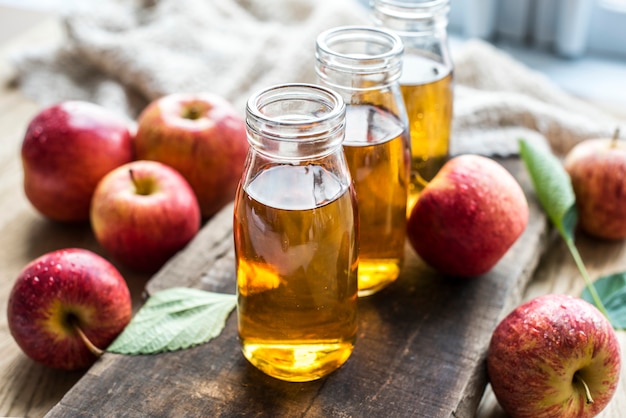
Your vinegar’s flavor profile depends heavily on the base ingredient you select. You can use fruit juices, wine, beer, or even grains as the primary source of sugar for fermentation. Apple cider vinegar is made from apple juice, while wine vinegar comes from red or white wine. The fresher the ingredients, the better the final product will taste. Organic and unpasteurized options are best, as they contain natural bacteria that help fermentation.
The Role of Acetic Acid Bacteria
The transformation of alcohol into vinegar is driven by a special group of bacteria known as Acetobacter. These bacteria are naturally present in the air and will colonize your fermenting liquid over time. However, to speed up the process and ensure success, you can add a vinegar mother, a gelatinous mass of bacteria and cellulose. The vinegar mother acts as a starter culture, accelerating the conversion of ethanol into acetic acid. Without these helpful bacteria, the process would be slow and inconsistent.
Creating a Safe and Controlled Environment
To encourage acetic fermentation, your mixture needs a stable, well-ventilated environment. Oxygen is crucial, as Acetobacter thrive in aerobic conditions. Covering your jar with a breathable cloth allows airflow while preventing contamination. The ideal temperature range is between 60-80°F (16-27°C), as lower temperatures slow fermentation and higher ones may kill the bacteria. Patience is key, as the full transformation can take anywhere from a few weeks to several months.
Using a Vinegar Mother or Starter
If you have an existing bottle of raw, unfiltered vinegar, you already possess a powerful tool to kickstart fermentation. Adding a few tablespoons of vinegar with a live mother to your base liquid can introduce beneficial bacteria. This speeds up fermentation and ensures a more predictable result. If you don’t have a vinegar mother, simply leaving your mixture exposed to air in a warm environment will allow natural bacteria to develop over time. Either method works, but using a starter is more reliable.
Vote
Who is your all-time favorite president?
Monitoring and Tasting Your Vinegar
Checking on your vinegar regularly is crucial to achieving the perfect acidity and flavor balance. Fermentation times vary depending on the base ingredient and environmental conditions. A good rule of thumb is to start tasting after three weeks and continue testing weekly. When the liquid has a pronounced tang and no trace of alcohol, it’s ready to be bottled. If it still smells boozy, let it ferment longer.
Filtering and Bottling the Vinegar
Once fermentation is complete, the vinegar should be strained to remove any solid particles. Using a fine-mesh strainer or cheesecloth ensures a smooth, clear final product. If a vinegar mother has formed, you can save it for future batches or share it with friends. Store your vinegar in glass bottles with airtight lids to preserve freshness. Avoid metal containers, as the acid can react with them.
Enhancing Flavor with Herbs and Spices
For a more complex taste, consider infusing your vinegar with herbs, spices, or fruit. Popular additions include garlic, rosemary, chili peppers, and citrus peels. Simply add your chosen ingredients to the bottle and let them steep for a few weeks. This creates a custom vinegar perfect for dressings, marinades, or cooking. The longer the infusion, the deeper the flavor.
Storing and Using Homemade Vinegar
Homemade vinegar has an indefinite shelf life when stored properly. Keep it in a cool, dark place away from direct sunlight and heat. Over time, a new vinegar mother may form, which is a sign of a thriving fermentation. If desired, you can remove and discard it, or use it to start a new batch. Regularly check for any unwanted mold or off-putting odors to ensure quality.
Benefits of Making Your Own Vinegar
- Healthier Option: No artificial preservatives or additives.
- Cost-Effective: Uses simple, inexpensive ingredients.
- Eco-Friendly: Reduces packaging waste from store-bought vinegar.
- Customizable: Adjust flavors to suit your preferences.
- Preservative-Free: Made naturally with beneficial bacteria.
- Versatile Uses: Perfect for cooking, cleaning, and wellness.
- Fun and Rewarding: A satisfying DIY project.
Watch Live Sports Now!
Dont miss a single moment of your favorite sports. Tune in to live matches, exclusive coverage, and expert analysis.
Start watching top-tier sports action now!
Watch NowCommon Mistakes to Avoid
- Using Pasteurized Ingredients: Kills beneficial bacteria.
- Sealing Too Early: Prevents proper oxygen exposure.
- Skipping the Starter: Slows down fermentation.
- Storing in Plastic or Metal: Can cause unwanted reactions.
- Ignoring Temperature Control: Too hot or too cold disrupts fermentation.
- Not Tasting Regularly: Leads to overly acidic or weak vinegar.
- Discarding the Vinegar Mother: Wastes a valuable fermentation aid.
Pro Tip: To test if your vinegar is ready, use a pH strip. A pH of 2-3 indicates optimal acidity for most culinary uses.
| Type of Vinegar | Base Ingredient | Fermentation Time |
|---|---|---|
| Apple Cider Vinegar | Apple Juice or Scraps | 4-6 Weeks |
| Wine Vinegar | Red or White Wine | 3-4 Months |
| Malt Vinegar | Fermented Barley | 2-3 Months |
“Fermentation is the magical process that transforms simple ingredients into complex, flavorful wonders.”
Making your own vinegar is a rewarding journey that connects you to the art of fermentation and flavor development. By understanding the science and nurturing the process, you can create a truly unique and delicious product. Whether for cooking, health, or household use, homemade vinegar offers unparalleled benefits. Why settle for store-bought when you can craft something extraordinary at home? If this guide inspired you, bookmark it, share it, and start your first batch today!