PowerPoint presentations are a cornerstone for delivering impactful messages, but nothing speaks professionalism better than a customized theme. Applying a custom theme allows you to align your slides with your brand, engage your audience, and leave a lasting impression. Whether you’re designing for a corporate meeting or a personal project, mastering this skill is essential. This guide walks you through the steps to create, apply, and optimize custom themes in PowerPoint, ensuring your presentations are visually consistent and tailored to your specific needs.
What Is a Custom Theme in PowerPoint?
A custom theme in PowerPoint includes unique design elements that represent your style or branding. It contains predefined settings such as color palettes, fonts, slide layouts, and effects. By using a custom theme, you can maintain consistency across all slides, improving the overall cohesiveness of your presentation. Creating a custom theme also saves time, as you don’t need to style each slide individually. With PowerPoint’s powerful tools, you can either modify an existing theme or create one from scratch.
Why Use a Custom Theme?
A custom theme not only enhances your slides but also helps build your brand identity. It ensures that your presentations stand out and resonate with your target audience. Standard themes can appear generic, while a personalized design shows professionalism. Moreover, a consistent look across your slides reduces distractions and keeps the audience focused on your content. Custom themes also allow you to highlight key points effectively, as you control the visual hierarchy.
How to Create a Custom Theme
To create a custom theme, start by opening PowerPoint and navigating to the “Slide Master” view. Here, you can design the master slide that serves as a template for all others. Choose a color scheme that matches your brand, and apply fonts that enhance readability. Don’t forget to save your theme by clicking on “Save Current Theme,” ensuring you can reuse it in future projects. This process is straightforward and requires no prior design experience.
Applying a Custom Theme to Your Presentation
Once your custom theme is ready, applying it is as simple as a few clicks. Go to the “Design” tab, select “Themes,” and choose your saved design from the list. All your slides will automatically adapt to the selected theme, ensuring uniformity. If you’ve received a theme file from someone else, use the “Browse for Themes” option to locate and apply it. This flexibility makes PowerPoint an ideal tool for professionals.
Modifying an Existing Theme
If creating a theme from scratch feels daunting, you can start with an existing one. Navigate to the “Design” tab and select a theme close to your vision. Modify the color palette, fonts, and slide layouts to fit your requirements. PowerPoint allows real-time previews, so you can see how changes affect your slides. Save the updated version as a new theme to avoid overwriting the original.
Vote
Who is your all-time favorite president?
Adding Custom Fonts and Colors
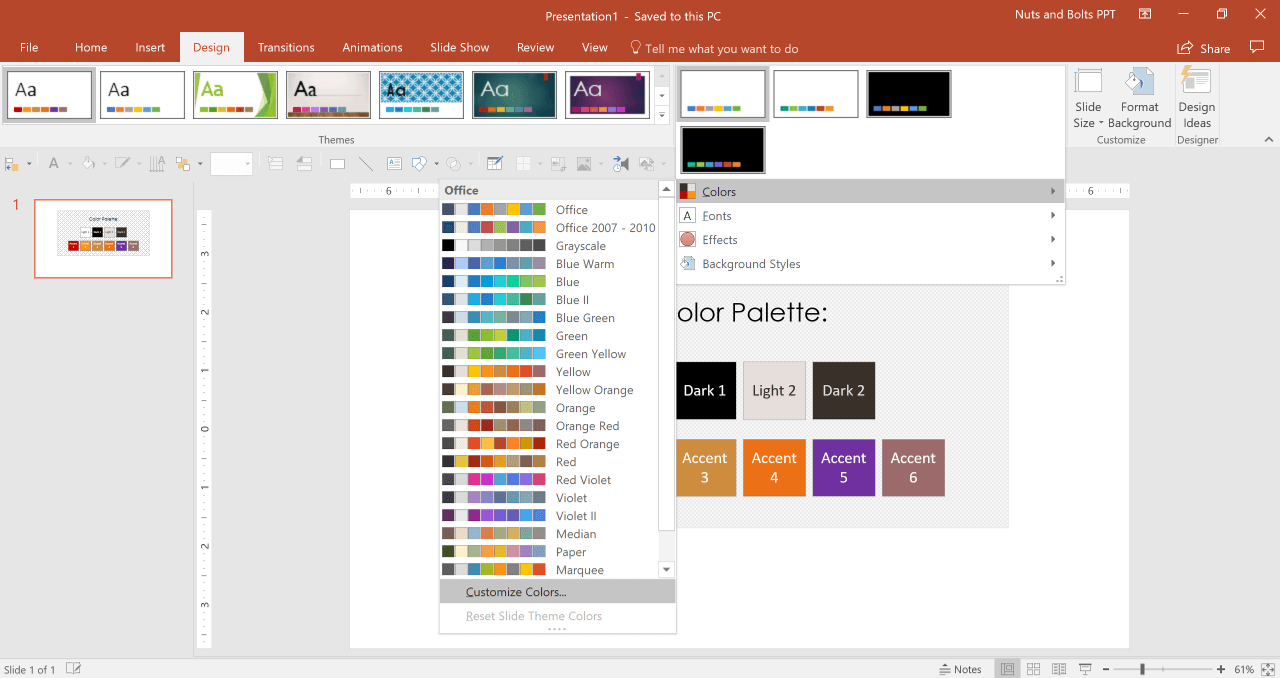
One of the best ways to personalize your theme is by adding custom fonts and colors. Head to the “Slide Master” and click “Fonts” to select or upload typefaces. Similarly, customize colors by choosing the “Variants” dropdown under the “Design” tab and selecting “Colors.” A harmonious color scheme can make your presentation visually appealing and memorable. Test these changes on different slides to ensure consistency.
Incorporating Logos and Backgrounds
A professional theme often includes your logo and a unique background. Use the “Insert” tab to place your logo on the master slide, ensuring it appears on all slides. For backgrounds, choose images or textures that complement your content. Make sure the visuals don’t overpower your text, as legibility is key. Customizing these elements adds a polished, branded look to your presentation.
Sharing Your Custom Theme
Sharing your theme with others ensures consistency across collaborative projects. Save the theme as a .thmx file and share it with your team via email or cloud storage. Recipients can easily import the theme into their PowerPoint application by clicking “Browse for Themes.” This feature is particularly useful for teams working on large-scale presentations. A shared theme guarantees that all contributors follow the same design guidelines.
Advertisement
Troubleshooting Common Issues
Sometimes, custom themes may not appear as expected due to software compatibility or file corruption. Ensure you’re using the latest version of PowerPoint to avoid glitches. If elements like fonts or colors don’t display correctly, double-check that they are embedded in the theme. Additionally, test the theme on different devices to ensure consistency. A few adjustments might be necessary to perfect the design.
Best Practices for Custom Themes
To create an effective custom theme, keep your design simple and professional. Use a maximum of two or three fonts and stick to a cohesive color scheme. Avoid overcrowding slides with too many elements, as minimalism enhances readability. Regularly update your themes to stay aligned with your evolving branding. These practices ensure your presentations remain relevant and impactful.
7 Steps to Apply a Custom Theme
- Open PowerPoint and go to the “Design” tab.
- Click on “Themes” and select “Browse for Themes.”
- Locate your saved theme file and click “Open.”
- Review your slides to ensure the theme is applied correctly.
- Adjust individual slide elements if necessary.
- Save your presentation with the updated theme.
- Share the final file with stakeholders.
Watch Live Sports Now!
Dont miss a single moment of your favorite sports. Tune in to live matches, exclusive coverage, and expert analysis.
Start watching top-tier sports action now!
Watch Now7 Benefits of Using Custom Themes
- Enhances visual consistency across slides.
- Saves time by eliminating repetitive formatting.
- Strengthens brand identity and professionalism.
- Simplifies collaborative projects by standardizing design.
- Offers flexibility for modifying layouts and colors.
- Ensures readability with optimized fonts and colors.
- Makes presentations more engaging and memorable.
Pro Tip: When designing a theme, always preview it on multiple devices and screen sizes to ensure your presentation looks great everywhere.
| Feature | Benefit | Example |
|---|---|---|
| Custom Colors | Enhances branding | Brand-specific palette |
| Slide Master | Consistency | Uniform layouts |
| Embedded Fonts | Readability | Custom typography |
“A well-designed custom theme is the foundation of a compelling presentation.”
By applying a custom theme in PowerPoint, you can transform your slides into a powerful visual tool that effectively conveys your message. Reflect on the tips shared in this guide and start designing your unique theme today. If you found this article helpful, bookmark it and share it on social media to inspire others in your network. Let your creativity shine through your presentations, and watch how a tailored theme can captivate your audience.