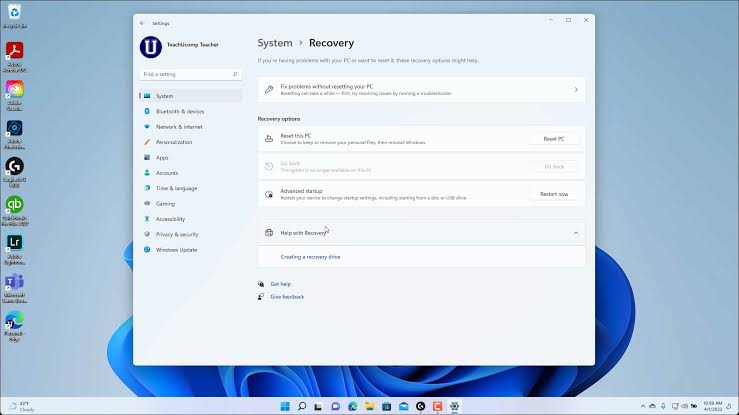
Wiping out Windows 11 from your computer involves a series of steps to ensure a clean removal of the operating system and preparing for a fresh installation or switching to an alternative OS. Whether you’re looking to revert to a previous Windows version or transition to a different operating system altogether, careful preparation and execution are essential to avoid data loss and ensure a smooth transition.
Backup Important Data
Before proceeding with the removal of Windows 11, it’s crucial to backup any important data stored on your computer. This includes documents, photos, videos, and any other files you want to preserve. You can use external storage devices such as USB drives, external hard drives, or cloud storage services to securely backup your data. This step ensures that you can restore your files after reinstalling Windows or installing a different operating system.
Create Installation Media
To wipe out Windows 11 and reinstall an earlier Windows version or another operating system, you’ll need installation media. This typically involves creating a bootable USB drive or DVD with the installation files for the OS you intend to install. Microsoft provides tools like the Media Creation Tool for Windows or third-party software like Rufus to create bootable media easily. Make sure to download the installation files from a trusted source and follow the instructions provided to create the bootable media.
Access BIOS or UEFI Settings
Before wiping out Windows 11, you’ll need to access the BIOS (Basic Input/Output System) or UEFI (Unified Extensible Firmware Interface) settings on your computer. This allows you to change the boot order and boot from the installation media you’ve created. Restart your computer and look for the key (often Del, F2, F12, or Esc) to enter BIOS/UEFI settings during the startup process. Once inside the BIOS/UEFI, navigate to the boot options and prioritize booting from your USB drive or DVD containing the installation files.

Format the Hard Drive
To completely wipe out Windows 11, you’ll need to format the hard drive where the operating system is installed. During the installation process of your new OS, you’ll have the option to format the drive. This step erases all existing data on the selected drive, so make sure you’ve backed up any important files beforehand. Most installation wizards will guide you through partitioning and formatting options, allowing you to delete existing partitions and create new ones according to your needs.
Install the New Operating System
Once you’ve formatted the hard drive, proceed with installing the new operating system. Insert the bootable USB drive or DVD into your computer and restart it. Follow the on-screen instructions to begin the installation process. You may need to enter your product key (if required) and configure settings such as language, time zone, and user accounts. Be patient as the installation progresses, and ensure your computer remains connected to a power source throughout the process to prevent interruptions.
Post-Installation Steps
After installing the new operating system, there are several post-installation steps to complete the setup and ensure optimal performance:
Install Drivers and Updates
Install necessary drivers for your hardware components such as graphics cards, network adapters, and peripherals. Check the manufacturer’s website or use device manager to update drivers to the latest versions for compatibility and performance improvements.
Restore Backed-Up Data
Once the new operating system is installed and configured, restore your backed-up data from external storage or cloud services. Transfer your documents, photos, videos, and other files back to your computer to resume normal use.
Configure Security Settings
Ensure your computer is secure by configuring antivirus software, enabling firewall protection, and updating security settings. This helps protect your system from malware, viruses, and unauthorized access.
Customize System Preferences
Customize your new operating system according to your preferences. Adjust settings such as desktop backgrounds, screen resolution, power options, and default applications to personalize your computing experience.
Considerations and Troubleshooting
During the process of wiping out Windows 11 and installing a new operating system, you may encounter various challenges or issues. Here are some common considerations and troubleshooting tips:
Compatibility Check
Before installing a different operating system, ensure compatibility with your computer’s hardware components. Check system requirements and verify driver availability to avoid compatibility issues and ensure optimal performance.
Data Recovery
In case of accidental data loss or formatting errors, data recovery software may help retrieve lost files. Use reputable recovery tools to scan your hard drive and attempt to recover deleted files if necessary.
BIOS/UEFI Settings
If you encounter difficulties accessing BIOS/UEFI settings or changing the boot order, consult your computer’s manufacturer documentation or support resources for specific instructions.
Professional Assistance
If you’re unsure about any step or encounter persistent issues, consider seeking professional assistance from IT professionals or computer repair services. They can provide expert guidance and ensure a successful transition to your new operating system.
Summary
Wiping out Windows 11 from your computer involves careful planning, backup of important data, creation of installation media, formatting the hard drive, and installing a new operating system. By following these steps methodically and considering post-installation configurations and troubleshooting, you can successfully transition to a different OS or revert to a previous Windows version while preserving your data and ensuring optimal system performance. Always prioritize backup and security measures to safeguard your files and enhance your computing experience.